Over the past 20 years, I cannot recall how many times I was in the middle of writing API tests or helper scripts
when suddenly the backend service went offline either due to an issue or maintenance. Earlier in my career, this
would result in a major roadblock as I would have to stop what I was working on and wait for the backend to be restored.
After several incidents like this, I was determined to find a solution that would allow me to continue working.
This is when I discovered "JSON-Server".
JSON-Server is a light weight application that can run locally and be configured to return custom responses mirroring
the real backend. Having this setup as a backup plan has been a game changer, allowing me to continue writing tests and
delivering on time.
I quickly discovered this could also be leveraged to easily test edge cases and error scenarios since I have the
ability to configure the response payloads. This helped strengthen the test suites and catch bugs that may occur intermittently.
In the next section, I'll walk through how to set up json-server and write some simple tests using Jest to validate the API responses.
Installation
Setting up JSON Server is pretty straightforward. You can install it globally using npm:
npm install -g json-serverDefining Endpoints and Response Payloads
The simplicity of JSON Server is one of its greatest strengths. Endpoints and response payloads can be quickly defined
in the repo's "db.json" file, which serves as the data source for the API. Ideally, the response payloads should mirror
the real backend, allowing you to easily test edge cases and error scenarios.
Multiple endpoints and response payloads can be defined in the "db.json" file, but for demonstration purposes,
I'll define a single endpoint ("Orders") which returns the response payload shown below.
{
  "orders": [
    {
      "id": "cc1a1c02-14ec-44fa-9704-c9dca91d321d",
      "email": "jose@gmail.com",
      "items": [
        {
          "id": "d527bf40-9e9e-489e-9f95-46fb0a40c11f",
          "department": "music",
          "price": 17
        },
        {
          "id": "2b344e1d-5963-4936-8f54-f667e2fdc6ee",
          "department": "music",
          "price": 14
        }
      ],
      "totalItems": 2,
      "totalPrice": 28
    },
    {
      "id": "ef023944-6556-41a1-86c1-d192ce7c20cc",
      "email": "kat87@aol.com",
      "items": [
        {
          "id": null,
          "department": "music",
          "price": 22
        },
        {
          "id": "978-0-7536-5990-8",
          "department": "books",
          "price": 18
        },
        {
          "id": "978-0-04-813606-0",
          "department": "books",
          "price": 17
        }
      ],
      "totalItems": 3,
      "totalPrice": 57
    },
    {
      "id": "60372ac1-200b-4fa6-b8a2-8898efc1e256",
      "email": null,
      "items": [
        {
          "id": "21e77f80-2380-4c3e-aaf6-498a33e61bcf",
          "department": "music",
          "price": 18
        }
      ],
      "totalItems": 1,
      "totalPrice": 18
    }
  ]
}
Starting the server
Run the following command in the terminal:
npx json-server
By default, this will start the server on port 3000.
If this conflicts with another service running on your machine, use the "--port" flag to specify a different port.
For Example, to start the server and use port 4000:
npx json-server --port 4000
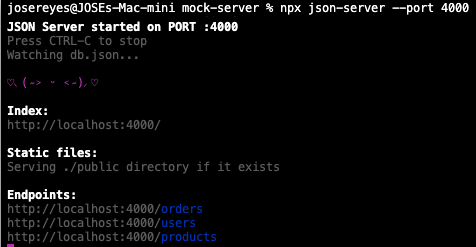
Once the server is running, you should see a message similar to the following in the terminal.
This indicates that the server is up and running and ready to accept requests. In this screenshot, the terminal indicates there are a total
of 3 endpoints defined in the "db.json" file (orders, users, products).
Retrieving data from the mock server
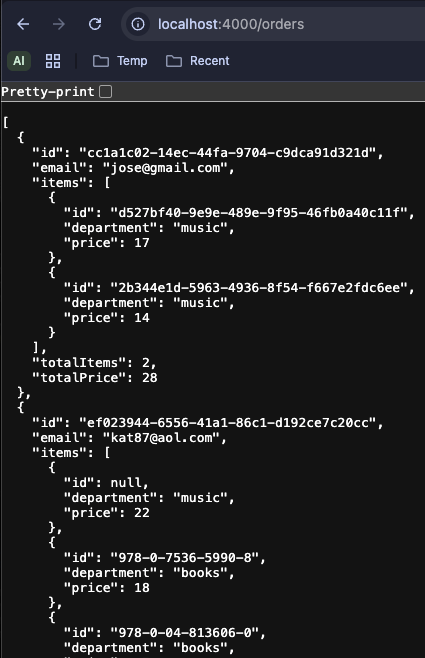
Now that the server is up and running, we can make a GET request to the "orders" endpoint to retrieve the response payload.
Since I started the server on port 4000, the endpoint I will be sending a request to:
"http://localhost:4000/orders"
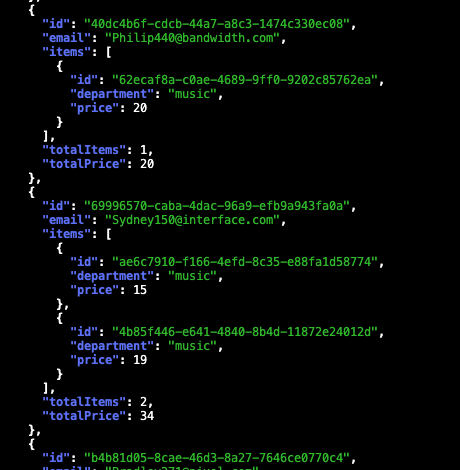
To quickly ensure the orders endpoint is returning the expected response payload, try the following:
Paste the endpoint URL in a Web browser
Run a cURL Command in the terminal
Validating the response
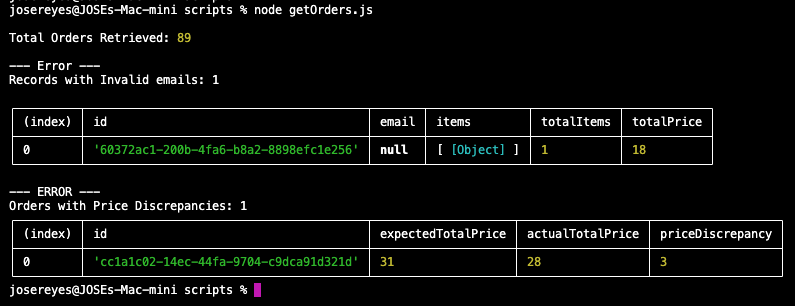
Ideally, I would use a testing framework like Jest to write a proper test suite with assertions, but for demonstration purposes, I'll create a script that iterates over the Orders response and prints a table with the problematic records.In your project, create a file called "getOrders.js" and copy/paste the code below. Make sure to update the URL in the fetch function if your JSON Server is running on a different port.
/*
  - Send GET request to orders endpoint.
  - Return error if response not successful.
  - Retrieve json response.
  - Print the total number of orders returned.
  - If invalid emails are found or the sum of items does not match the total price,
    print tables with the order details.
  - Ideally, we should perform assertions, however since this is a demo script
    and we know there are data issues, I've decided to simply print tables if
    problematic records are found.
*/

import assert from "assert";

async function checkOrderRecords() {
  try {

    /* Make request, return response, print total record count */
    const response = await fetch("http://localhost:4000/orders");
    if (!response.ok) {
      throw new Error(`HTTP error! Status: ${response.status}`);
    }
    const data = await response.json();
    console.log("\nTotal Orders Retrieved:", data.length);

    /* Records that contain invalid email address. */
    const emailRegex = /^[^\s@]+@[^\s@]+\.[^\s@]+$/;
    const invalidEmails = data.filter((order) => !emailRegex.test(order?.email));
    if (invalidEmails.length > 0) {
      console.log(`\n--- Error ---\nRecords with Invalid emails: ${invalidEmails.length}\n`);
      console.table(invalidEmails);
    }

    /* Records where the sum of the item price does not equal the totalPrice */
    const sumOfItems = data
      .map((order) => {
        const sum = order.items.reduce((sum, item) => sum + item.price, 0);
        return {
          id: order.id,
          expectedTotalPrice: sum,
          actualTotalPrice: order.totalPrice,
          priceDiscrepancy: sum - order.totalPrice
        };
      })
      .filter((order) => order.expectedTotalPrice !== order.actualTotalPrice);
    if (sumOfItems.length > 0) {
      console.log(`\n--- ERROR ---\nOrders with Price Discrepancies: ${sumOfItems.length}`);
      console.table(sumOfItems);
    }

    /* Assertions to be used in CI Pipelines
    assert(invalidEmails.length === 0, `${invalidEmails.length} order(s) with invalid email address.`);
    assert(sumOfItems.length === 0, `${sumOfItems.length} order(s) with Item sum & totalPrice mismatch.`);
    */

  } catch (error) {
    console.error("Error fetching orders:", error);
  }
}

checkOrderRecords();
Run the script in the terminal via:
node getOrders.js
The following tables are returned, displaying the records in which errors were discovered.